DIY – Homemade Butter

Today we are starting with our Do It Yourself series. When I posted the recipe of Eggless Dry Fruit Cake, one of my friends Anandita requested for homemade butter recipe. In most of the families, if you consume whole milk, you tend to get thick milk skin. Butter is derived from that thick milk skin akka malai.

I collect malai everyday in a bowl and store it in the freezer. Once 2-3 cups of malai is collected, I convert it into butter and later into clarified butter (ghee). However before starting the process, you need to defrost the malai. I generally keep it at room temperature for almost 1hour. If you have less time, you can microwave the malai to defrost.

This homemade butter tastes heaven with stuffed parathas such as matar paratha, aloo paratha . It can also be used in gravies or sandwich. Homemade butter is also used in baking recipes.

Image

Here we go,

 Ingredients:

  • Malai – 2-3 cups
  • Cold Water – 2 cups


Method:

  1. Take the malai in the mixer jar. Add half cup of water.
  2. Start the mixer. During early mixing the malai will be converted into the smooth cream and as you mix more, the buttermilk and butter will separate.
  3. Add another cup of water and you will see butter floating in lumps.
  4. Collect the butter in a bowl with a spoon.

Image

Homemade butter is ready. Many of my friends make butter without mixer. They beat the malai thoroughly with a big spoon or a beater.

The process and ingredients remains same in that process as well.


If you found this post useful, I would really love if you pin it on pinterest, share it on facebook or tweet it on twitter. All it takes is a simple click.

It will keep us motivated. Thank YOU!!!!!!

Benefit Series – Mango

Known as “King of Fruits”, Mango has a lot of nutritional value besides its mouth watering taste & aroma. Mango houses rich enzymes, antioxidants, minerals and vitamins. It is a tropical tree cultivated in many regions of India and now it is also the most distributed fruit over worldwide.

Mango is one of the richest sources of Vitamin A and Vitamin C and minerals namely potassium, calcium and phosphorus. It is laden with fiber too. Consumption of foods rich in vitamin C helps the body develop resistance against infectious agents, thus increasing our body immunity.

Potassium is an important component of our body fluids that helps controlling heart rate and blood pressure. Mango provides 16mg of Potassium per 100gm. Sooo healthy right!!! J

Because of its high content of vitamin A, mango is known to promote good eyesight,prevents night blindness and dry eyes. One cup of sliced mangoes supplies 25 percent of the needed daily value of vitamin A. And high content of fiber in it helps keep digestion in check.

Mango is also helpful in beauty treatments, apart from its internal qualities. Mango, if applied directly on the skin, helps in clearing clogged pored and eliminates pimple.

In summer we should try to include mangoes in our daily diet. As in Indian households, after dinner one mango is religiously cut to savor as “Dessert”. Also, there are a lot of food variations which can be worked upon with them like ‘aam raas’ or Mango Milkshake.

Last week our family went on a small vacation to our native town in Konkan. Mango Gardens, there were packed with ripe mangoes. We got boxes full of them back to Mumbai and have been enjoying aam raas since. 🙂

Here is the easiest recipe with Mango –

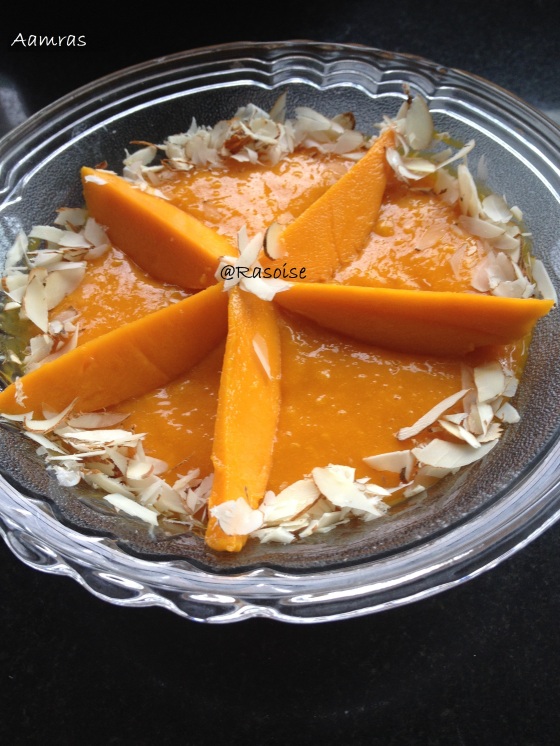
Aam Raas

Ingredients:

  • Mango – 3 Nos.
  • Sugar – 3 big spoon
  • Salt – Just a pinch

IMG_4562

Method:

  1. Take fresh mangoes and wash them under running water thoroughly.
  2. Now using your fingers soften the mango and take the seed (aam ki gutli) out of the fruit.
  3. Using you hands remove the mango pulp from the seed. Then use a spoon to remove the pulp from the cover of the fruit.
  4. Repeat steps 2 & 3 for other two mangoes.
  5. Transfer the pulp into a mixer. Add sugar and salt. Grind

IMG_4567

Aam Raas is ready. Transfer the aam raas from mixer to a bowls for serving. Enjoy as Dessert or with puris.

If you have a sweet tooth, try our other sweet dish recipes as well Ghiya ka Halwa and Dhondhas.

If you liked this post, consider linking to it or sharing it with others or like us on Facebook.

Happy Mango Season!!
Nidhi

Dahi Bhalla

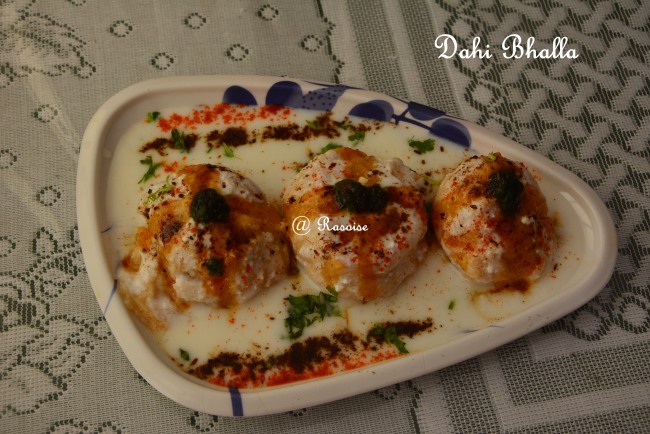
Curd  has several health benefits during summers. Many recipes will be made time and again in summers such as Kadhi Pakora, raitas and dahi bhallas. Dahi Bhalla is another typical recipe from Punjabi cuisine. My husband is fond of this platter like anything.  Dahi bhalla platter represents lentil dumping along with papdis and boiled potato pieces dipped in creamy yogurt with the flavor of spicy green Coriander and sweet tamarind chutneys.

Image

Dahi Bhalla can be served as side dish with Punjabi main course or can also be served as starter dish. Yesterday on hubby’s demand dahi bhalla was served J

I have used white urad dal without skin, you can use the urad dal with skin. However in the later case after soaking the dal overnight, you have to remove the skin before you could use it for fritters or dumpings or bhallas.

Here we go,

 Ingredients For Bhalla:

  • White Urad dal – 1
  • Green Chilli – 1 medium (finely chopped)
  • Cumin seeds – 1 tsp
  • Dry fruits – 8-10 cashews and raisins each
  • Salt – To taste


Method:

  1. Wash the urad dal twice in the flowing water. Soak the dal overnight.
  2. In the morning remove excess water (if any) and then grind the dal to a smooth batter. Add salt while grinding and if required add little water in between.
  3. Add finely chopped green chilli and cumin seeds.
  4. Now mix the batter with little force for couple of minutes, so that batter becomes light and fluffy. Add dryfruits. Again mix them.
  5. You can check if the batter is by dropping a spoonful of batter in water, if it floats its ready.
  6. Heat oil in a heavy bottom wok. When oil is medium hot, take a spoonful of urad dal batter and pour in the oil. Deep fry till golden brown and crisp.
  7. Take lukewarm water with little salt in a big bowl. Put the hot bhallas in the water and keep it aside for half hour.
  8. Post half hour, take bhalla one by one and press between your palms to drain the excess water. Do not over press the bhallas, otherwise it will break into pieces.

Image

Ingredients For Bhalla Platter:

  • Potato – ½ medium (boiled and cut into cubes)
  • Yogurt – 1 cup (beaten smooth)
  • Green Coriander Chutney – to taste
  • Red tamarind chutney – to taste
  • Bhallas – 3 nos
  • Cumin powder (Roasted jeera powder) – a pinch
  • Red chilli powder – a pinch
  • Chaat Masala – a pinch
  • Chopped coriander – few chopped
  • Anar Dana (optional) – ½ tsp

Image

Method:

  • Arrange bhallas, boiled potato cubes in the serving tray / bowl. Spread beaten smooth curd on the bhallas.
  • Now put some green coriander chutney followed by red tamarind chutney.
  • Sprinkle black salt, chaat masala, red chilli powder and cumin powder.
  • Garnish with chopped coriander and Anar dana.

Dahi Bhalla Platter is ready!!

I am sure you will be eager have this yum yummy Dahi Bhalla platter, Enjoy!!!!! Do not forget to check out our easy Cholle Bhature recipe!!!!

Check out our most unique recipe Dhondas here!!!!

If you liked this post, kindly consider linking to it or sharing it with others or like us on Facebook and twitter.

Happy Cooking!! 🙂

Nancy


Raw Mango Chutney

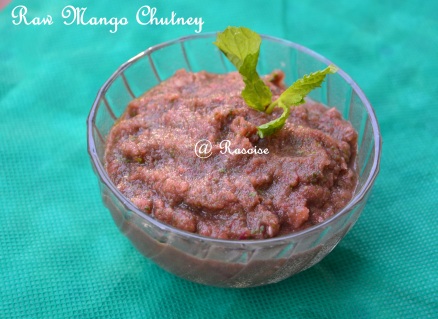
Yesterday when I went to market for vegetable shopping, I could see kachhi Kerry on almost every vegetable counter. I was tempted and I bought some Kerry. Immediately after reaching home, I made raw mango akka kachhi Kerry chutney.

There are many recipes where main ingredient is raw mango. Aam ka panna, Kerry chunda, Kerry ki curry and chutney. This summer, I will definitely try catching up these recipes…J

You can serve this raw mango chutney with any kind of stuffed paratha such as Aaloo paratha / Matar paratha .

Raw Mango 1

Here we go,

 Ingredients:

  • Raw Mango – 1 small (peeled, cut into small pieces)
  • Onion – 1 small (Cut into pieces)
  • Coriander Leaves – 100gms
  • Pudina Leaves _ few (optional)
  • Green Chilli – 1 small
  • Salt – To taste

Raw Mango Ing

Method:

  1. Chop raw mango, onion and green chilli into small pieces.
  2. Wash coriander leaves in the water.
  3. Grind all the ingredients in a mixer grinder.
  4. Raw mango chutney is ready.

The color of chutney is because of the onion used. You can also used white onion or spring onion. then probably the color of the chutney will be more green.

Raw Mango 2

If you found this post useful, I would really love if you pin it on pinterest, share it on facebook or tweet it on twitter. All it takes is a simple click.

It will keep us motivated. Thank YOU!!!!!!

Do not forget to check our Coconut Lasoon Chutney and yummy Matar Kachori !!

Nancy

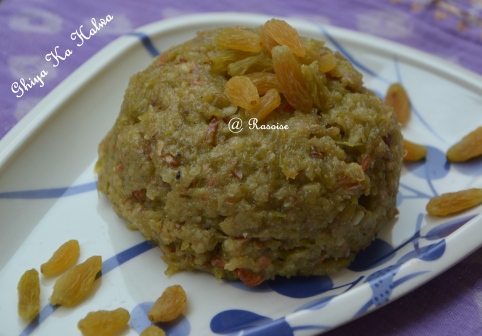
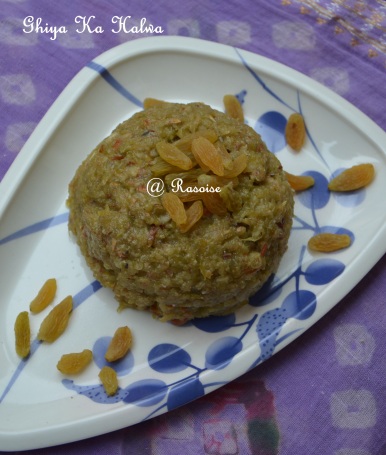
Ghiya Ka Halwa

Many a times when we see ghiya or lauki or dudhi in the fridge, we are lost. The question which immediately clicks our brain is “ Ghiya ka kya banau, kaise khatam karu”.

Generally when it is bottle gourd, I love making koftas, or even raita or halwa. You can check my ghiya ke kofte recipe here. Though the recipe takes almost an hour to get ready, however the taste is so yummy, you actually forget that an hour of stiring pain in your arms.

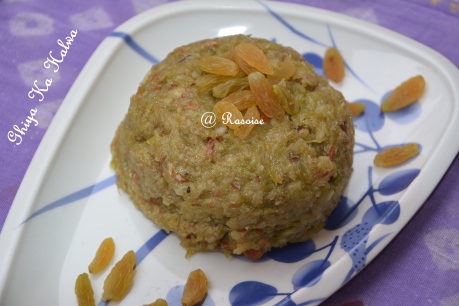
So lets solve your query of how to consume ghiya, with ghiya ka halwa. A delicious and healthy desert, with lots of milk and dry fruits.

Ghiya Halwa

Here we go,

 Ingredients:

  • Ghiya (Bottle Gourd) – 1 large (grated)
  • Milk – ¾ litre
  • Ghee – 1 big spoon
  • Sugar – ½ cup
  • Almond – ½ cup coarsely chopped
  • Raisins – few soaked
  • Green Cardamom Powder – ½ tsp
  • Roasted Cashews – 10 nos.

Ghiya Halwa 2JPG

Method:

  1. Take a heavy bottom wok and add ghee. Allow it to melt.
  2. Add grated bottle gourd and sauté till the water from bottle gourd is evaporated. It will take around ten minutes.
  3. Add half the milk to the bottle gourd and stir continuously on medium flame. It should not stick with bottom of the wok. It will take around fifteen minutes for the milk to evaporate.
  4. Now add remaining milk to the mixture and stir continuously on medium flame.
  5. Once the milk is about to evaporate completely, add sugar. Stir continuously for another five minutes.
  6. Off the flame and add coarsely chopped almonds, cardamom powder and sauté.
  7. Garnish with cashews and raisins.

Ghiya Halwa 3

If you found this post useful, I would really love if you pin it on pinterest, share it on facebook or tweet it on twitter. All it takes is a simple click.

It will keep us motivated. Thank YOU!!!!!!

Do not forget to check our unique sweet dish Dhondas and yummy yummy Eggless Dry Fruit Cake !!

Nancy 🙂

Eggless Dry fruit Cake

This Eggless Dry fruit Cake is very close to my heart……..Today I baked my first cake!!!!

It turned out really well, yummy and delicious.

I had never baked before. My mom used to make vanilla cake, chocolate cake during our childhood days.

This version of cake is really healthy as it contains lots of dry fruits and dates, less of sugar (as compared to other cakes), contains milk and butter. So because the ingredients are healthy…the final product is healthy…..

Image

Here we go,


Ingredients:

  •  All purpose flour – 1 cup
  • Dates – 20 (seedless)
  • Milk – 1 cup
  • Dry fruits – 1 cup (mix of almond, cashew, walnut)
  • Sugar – ½ cup
  • Baking powder – 1 tsp
  • White Butter – ½ cup (homemade)
  • Milk skin (Malai) – ¼ cup
  • Raisins – few

Image

 Method:

  1. Bring milk to a boil with dates. Allow it to cool at room temperature.
  2. In the meantime, take a big bowl and sieve all purpose flour and baking powder in it.
  3. Add milk skin and butter. Mix it well for five minutes. Keep it aside
  4. Now grind milk and dates along with sugar. Grind it to a fine paste.
  5. Add this paste to all purpose flour and butter mixture.
  6. Add dry fruits (coarsely crushed) to the mixture.
  7. Grease the baking tray with oil. Transfer the batter to the baking tray.
  8. Garnish it with raisins.
  9. Now bake the cake in convention on 160C for 35 to 40 minutes. You can check after twenty minutes.
  10. Mine was done in 35 minutes.

The cake is ready!! 🙂

If you like the recipe, leave a comment !!

Nancy

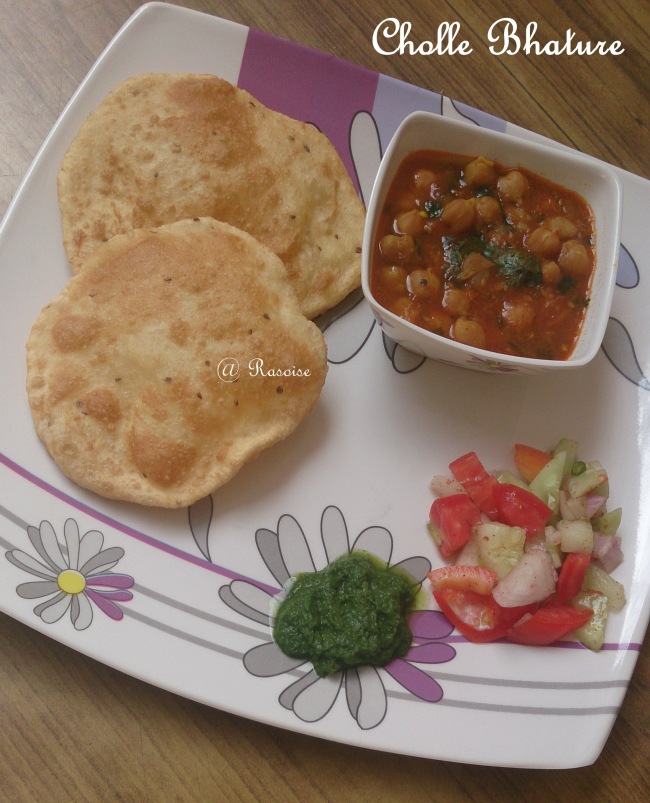
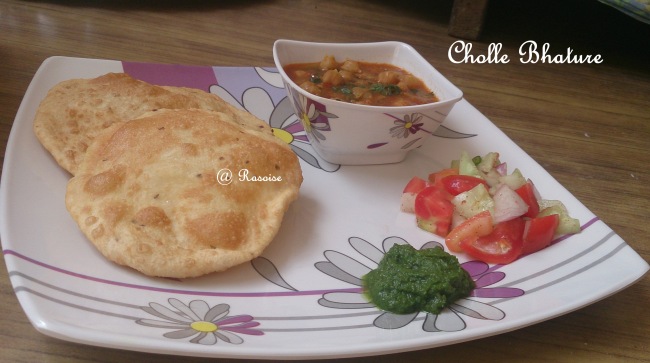
Cholle Bhature

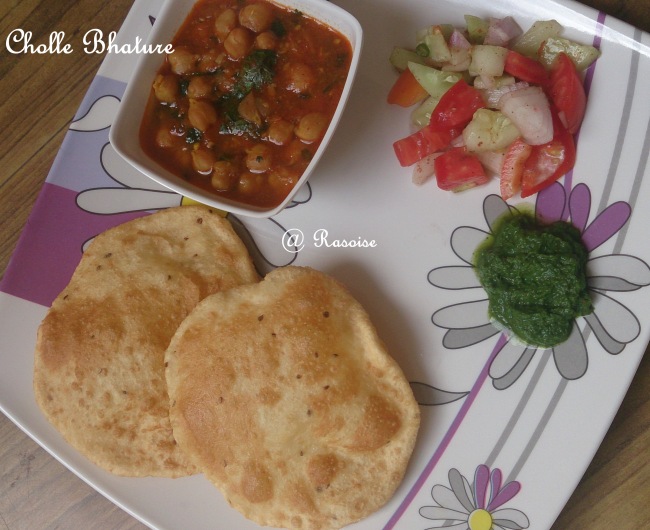
Today I am here with a typical Punjabi recipe, “Cholle Bhature”. I have been eating cholle bhature since childhood. Needless to say that I learnt this dish from my mom.

Yesterday, there was a small get together at my mother’s place. Me, my husband, Nidhi, our bro, mom dad, everybody was there. And the menu was Cholle Bhature muahhh!!! Love you mom….

Cholle here refers to a spicy curry and bhature to fried flat bread. The below recipe would definitely taste different from one’s we eat in restaurants.

Image

Here we go with the recipe,

Ingredients For Cholle:

  • Cholle (white chickpeas) – 1 cup (soaked overnight and boiled)
  • Onion – 2 medium sized (finely chopped)
  • Tomato- 2 medium sided (blended into smooth paste)
  • Ginger Garlic Paste – 1 tsp
  • Green Chilli – 2 nos. (finely chopped)
  • Cumin Seeds – ½ tsp
  • Tej Patta – 1 large
  • Cloves – 3-4
  • Salt – to taste
  • Red Chilli Powder – 1 tsp
  • Turmeric Powder – ½ tsp
  • Cholle Masala – 1 tsp
  • Garam Masala – ½ tsp
  • Coriander Powder – 1 tsp
  • Coriander Leaves – few (finely chopped)

Method:

  1. Heat the oil in a pan on medium heat. Once hot, add cumin seeds, tej patta and cloves. Let them sizzle.
  2. Add ginger garlic paste and sauté for a minute.
  3. Add chopped onions and green chilli. Saute for another two minutes.
  4. Add blended tomatoes. Mix well and stir continuously till the raw smell goes away and oil starts leaving in the side of the paste.
  5. Add salt, red chilli powder, turmeric powder, garam masala, coriander powder and mix well.
  6. Add the boiled Cholle and stir continuously till it comes to a boil.
  7. Let it cook on low flame for another ten minutes. If you want to dilute the gravy add water.
  8. Check the seasoning and add more salt or spice powders if required.
  9. Garnish with chopped coriander leaves.

Image

Ingredients For Bhature:

  • Maida (All pupose flour) – 1 cup
  • Sooji – ½ cup
  • Baking Powder – ½ tsp
  • Oil – 2 tsp
  • Curd – ½ cup
  • Ajwain – 1 tsp
  • Salt – 1tsp
  • Water

 Method:

  1. If bhaturas are to be made in the morning, then start a night before. If you plan to make bhaturas in afternoon lunch, then start in the same morning.
  2. Take a big bowl, and mix all the ingredients and make a soft dough. Cover it with a muslin cloth.
  3. Allow it to ferment for few hours atleast 6 hrs.
  4. Again knead the dough for two minutes.
  5. Form it in to 10 balls and roll them into 5-6 inch discs.
  6. Heat oil in a heavy base wok.
  7. Deep fry the bhaturas in the same way as we fry pooris. Serve the hot bhaturas with cholle.

Cholle Bhature is ready. You can serve it with onion and pickle as we see in restaurants.

Image

My mom served it with green chutney and mix salad of onion, tomato, cabbage, cucumber and green chilli with some rock salt and chat masala sprinkled on it!!

Enjoy!!

Nancy


Sabudana Khichdi / Pulao

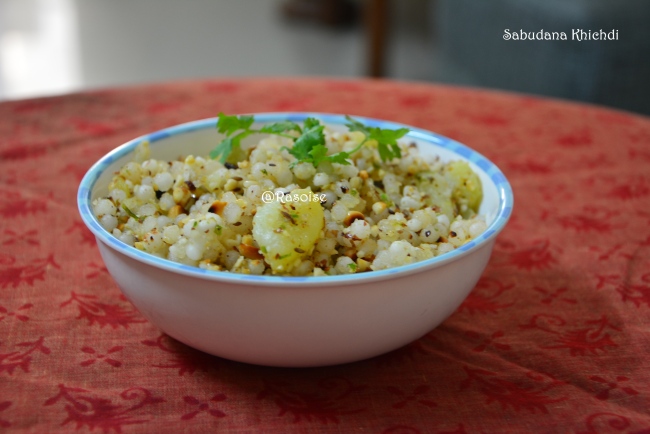
Long time back, almost say in 2007-08, when I was doing MBA in Pune, we (me and my two friends) used to visit a breakfast snacks corner near our college. Every Monday morning used to be special for us, because every Monday sabudana khichdi used to be the morning breakfast at the snacks corner.

The sabudana khichdi with sweet curd, hhmm awesome, really tasty. Even today whenever I remember those days, I cannot resist making the khichdi.

Image

Here we go with the recipe,

Sabudana is the major ingredient used during fasting / Vrat. Sabudana Khichdi recipe comes from Maharashtrian cuisine and it tastes heaven with sweet curd. Unlike Sabudana khichdi, you can also check my recipe sabudana roll, which can also be made during fast or vrat.

Ingredients

  • Sabudana (sago) – 1 cup (Soaked overnight and drained)
  • Potato – 1 medium (boiled, peeled and cut into small pieces)
  • Peanuts (mungphali) – ½ cup (roasted, deskinned and coarsely grinded)
  • Green Chillies – 2 (finely chopped)
  • Cumin seeds – ½ tsp
  • Lemon Juice – 1tsp
  • Coriander Leaves – few (chopped)
  • Senda namak – To taste

Image

Method:

  1. Soak sabudana overnight with just enough water to cover it (minimum 6hrs of soaking is required). Drain it in the morning. (Soaking is the most important part of the recipe)
  2. Heat oil in a wok. Add cumin seeds. Allow them to crackle. Add boiled potato pieces. Saute for few seconds and add green chillies.
  3. Add sabudana and sauté for a minute or till the sabudana pearls become transparent.
  4. Add coarsely crushed peanuts and salt. Sauté again for a minute.
  5. Close the flame. Add lemon juice.
  6. Garnish with coriander leaves.

Image

Serve hot with sweet curd!!

Enjoy Cooking!!!!

Nancy

Sabudana Roll

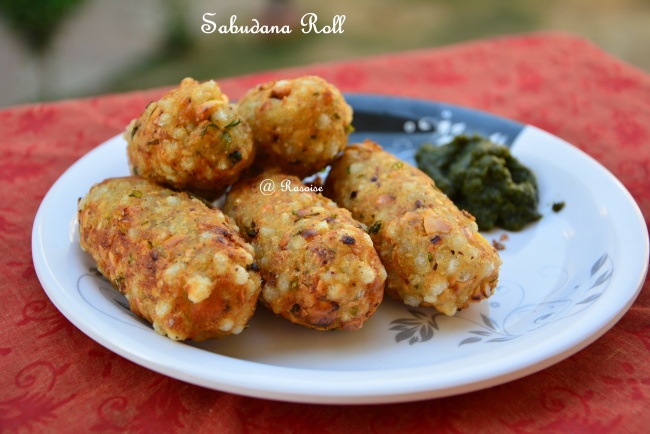
Sabudana (Sago) is the major ingredient used during fasting / Vrat. Since Navratri is on, I thought of preparing few recipes of sabudana. Today I am sharing the recipe of Sabudana Roll, a crisp and delicious snack which can be served in morning or evening snack or even as a side dish in main course. Sabudana Roll recipe comes from Maharashtrian cuisine and it tastes heaven with sweet curd.

Image

Here we go with the recipe,

Ingredients

  • Sabudana (sago) – 1 cup (Soaked overnight and drained)
  • Potato – 3 medium (boiled and mashed)
  • Rice Flour – 2 tsp
  • Peanuts (mungpahli) – ½ cup (roasted, deskinned and coarsely grinded)
  • Green Chillies – 2 (chopped)
  • Lemon Juice – 1tsp
  • Coriander Leaves – few (chopped)
  • Senda namak – To taste

Image

Method:

  1. Soak sabudana overnight (minimum 6hrs of soaking is required). Drain it in the morning.
  2. Take a big bowl with drained sabudana. Add mashed potatoes, roasted peanuts, green chillies, coriander leaves and mix well.
  3. Add rice flour (if you are making it for vrat then do not add rice flour)
  4. Add lemon juice and senda namak. Mix them well. All the ingredients should bind really well.
  5. Now take small portion of the mixture and shape it in a roll. Make the roll of the remaining mixture.
  6. Deep fry the sabudana rolls till golden brown.

Serve hot with sweet curd or green chutney or tomato ketchup.

Hope you liked it!!

Enjoy Cooking!!!!

Nancy